Readers,
Nobody needs a flamingo shirt. But almost everybody could use something flamingo shirt-ish. What I mean is, most of us want something in our wardrobes that has some zip to it, that makes you smile when you wear it, and that makes others smile, too (one hopes for the right reasons).
Last fall I made a flamingo shirt for Jack for his birthday.

It’s turned out to be one of the best things I’ve ever made. And I don’t mean just technically, although I am proud of the matching job I did.
No, I mean I succeeded at another kind of matching job: matching a fabric and a pattern with the personality of the wearer. Jack’s smile when he slipped on the finished shirt was all the proof I needed.
Sewing projects can be driven by many things: an exciting pattern, an irresistible fabric, an important occasion, a new job or role, a need for coordinating garments, and more. The flamingo shirt project was, obviously, driven by an irresistible fabric.
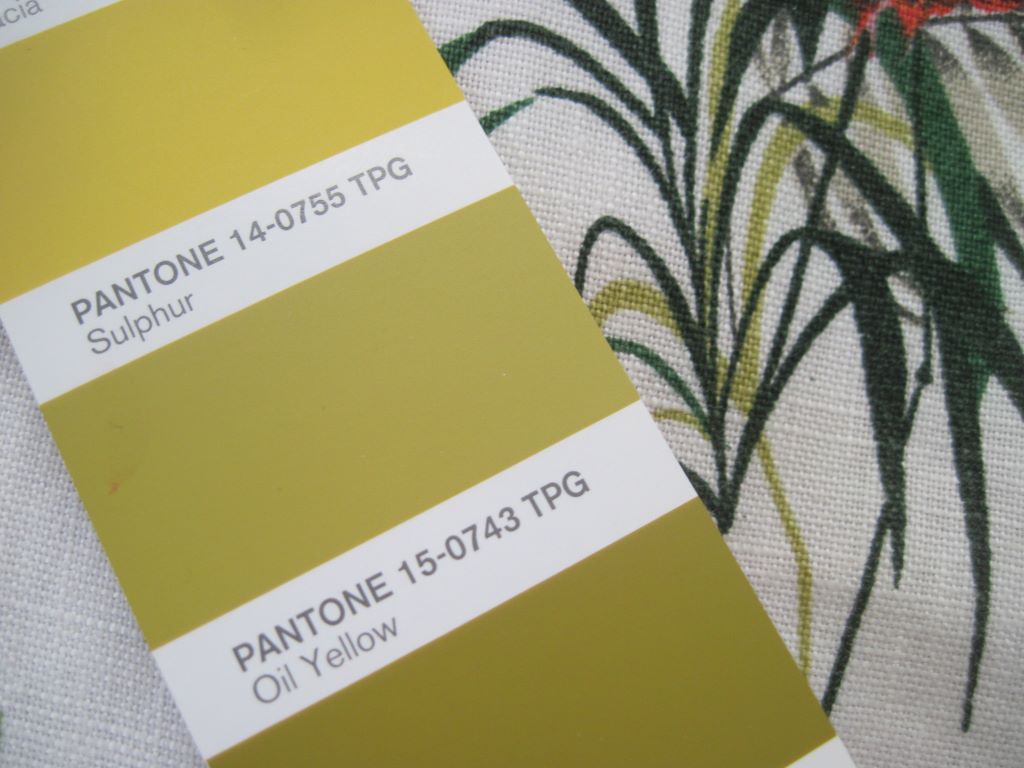
There I was one day last fall, idly browsing the new additions to the Britex Fabrics website, when I came across this “tropical flaming flamingos linen print.”
Boom! I loved this print. But I didn’t see myself wearing it; the scale was too big and the print too busy for me. I wondered, though, whether Jack would like this. I asked him whether he liked it enough for me to order a swatch. Yes indeed. I detected real interest, not just a polite affirmative.
Days later the swatch arrived, looking just as beautiful as the Britex online photos. This linen had such a wonderful weight and feel. The colors were rich and complex.


But what about the print? Was it a good choice for Jack?
Jack’s shirt wardrobe boasted single colors, stripes, plaids, corduroys, and flannels, but no prints. Prints–it’s hard to find one that’s just right. Some are corny, others are off in scale or wrong for the wearer’s coloring. But there was something strangely appealing about these flamingos. They were regal and dignified. For all their flamboyance these flamingos had gravitas.
The scale and colors were right for Jack, and the quality of the linen was spot-on. But most important, this fabric just made you smile. When I asked Jack whether he would really like a shirt from this fabric–which would be a fashion leap for him–his answer was an unequivocal Yes.
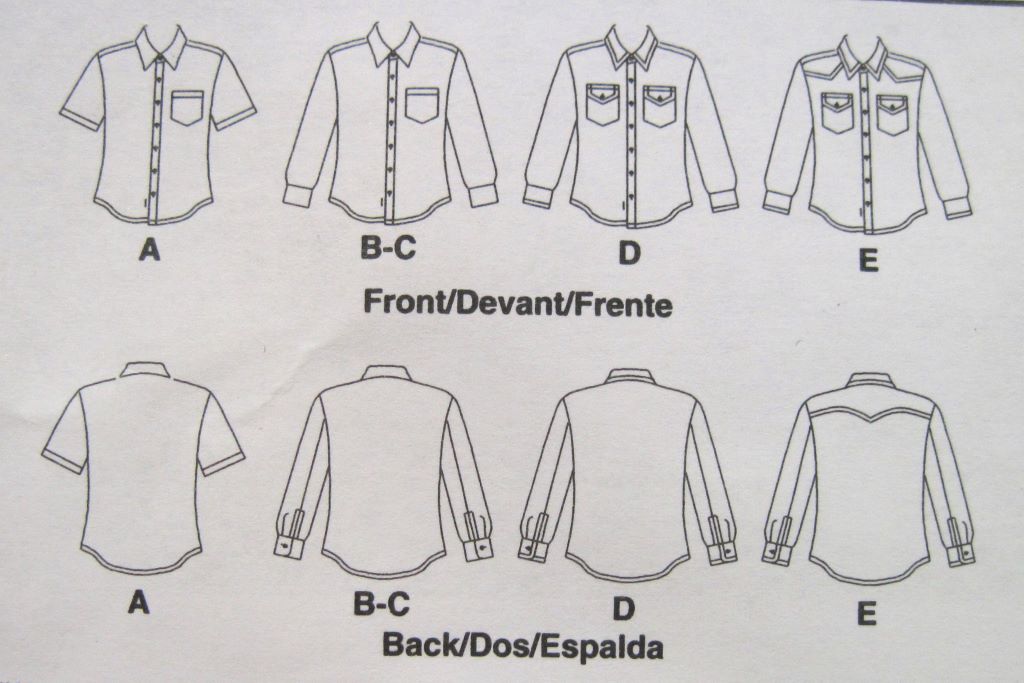
Before I could order the yardage I had to find a different shirt pattern. I’d never really thought about it before but I’d always sewn Jack’s shirts with yokes. I wanted to break up the flamingo pattern as little as possible. I chose McCall’s 6044.
I made a muslin and added 2″ to the length of the front, back, and front band and 1 1/4″ to the length of the short sleeve.
I’ve forgotten how many yards I ended up ordering. I thought I’d estimated on the generous side, but because both vertical and horizontal repeats were big, I didn’t have enough left to cut one extra piece of any size.
I wanted some freedom in the positioning of the motifs but also had to budget fabric well enough to match the fronts, back, and front bands. I’m experienced in matching plaids and working with stripes, but I wouldn’t say I’m confident. In a choice between accuracy and speed, I’ll choose accuracy and go triple-slow if necessary.
So I proceeded with all deliberate speed and caution. With loads of steam from my gravity feed iron I pressed the linen and unfurled it onto my worktable island to cut single-layer.
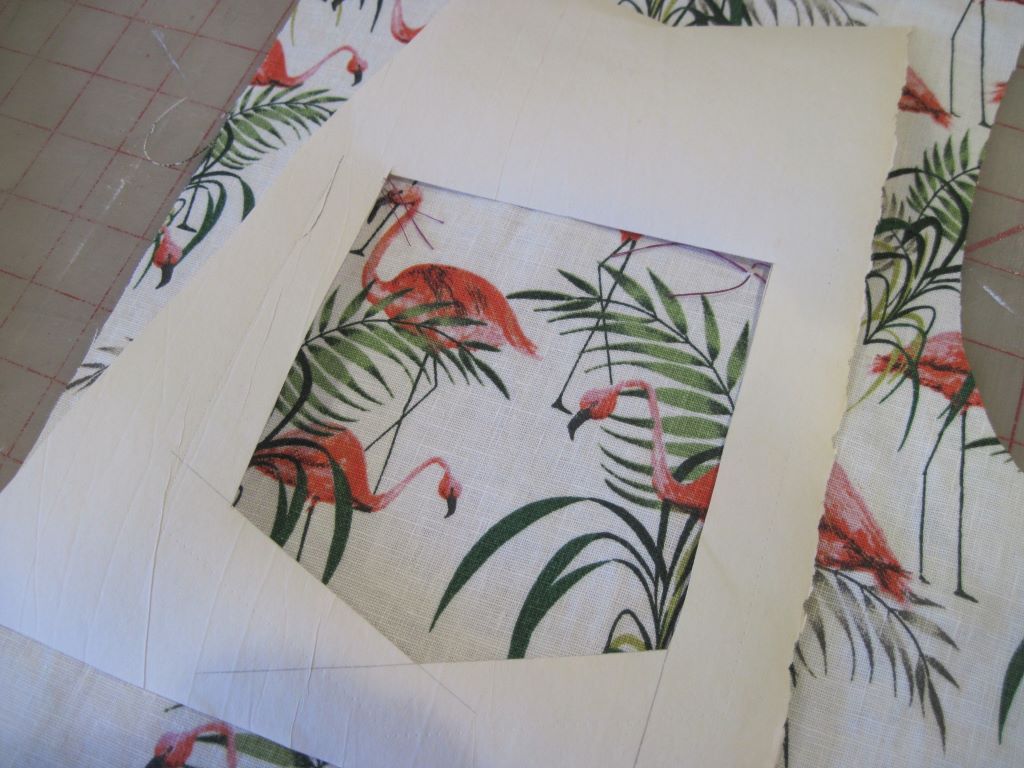
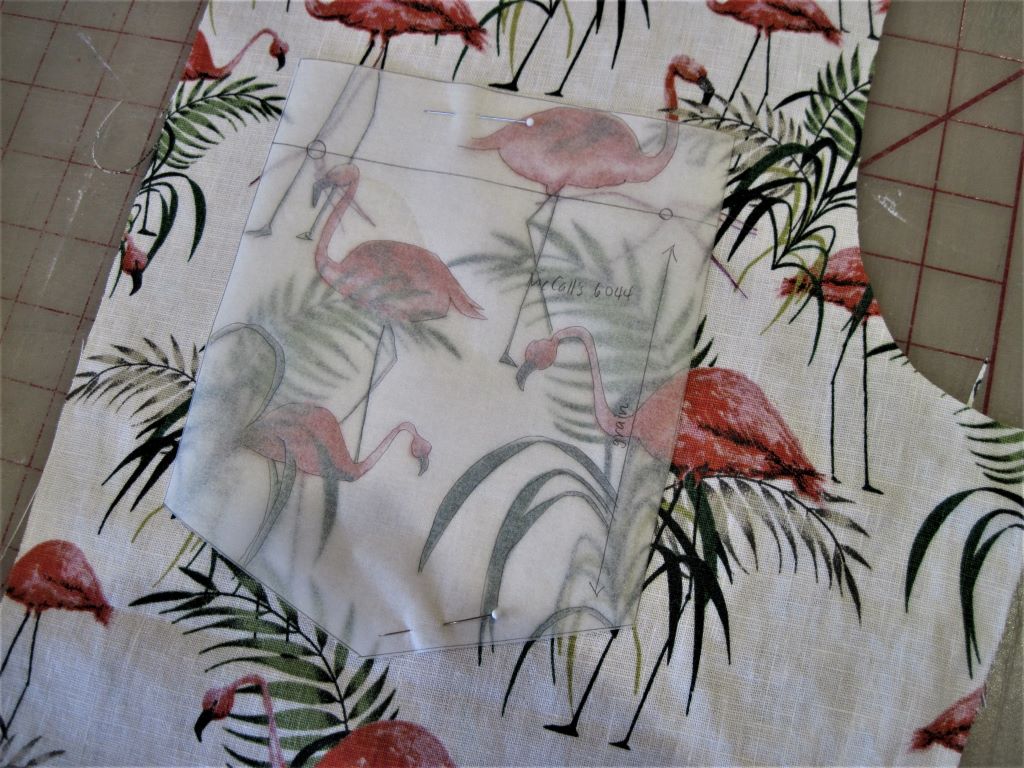
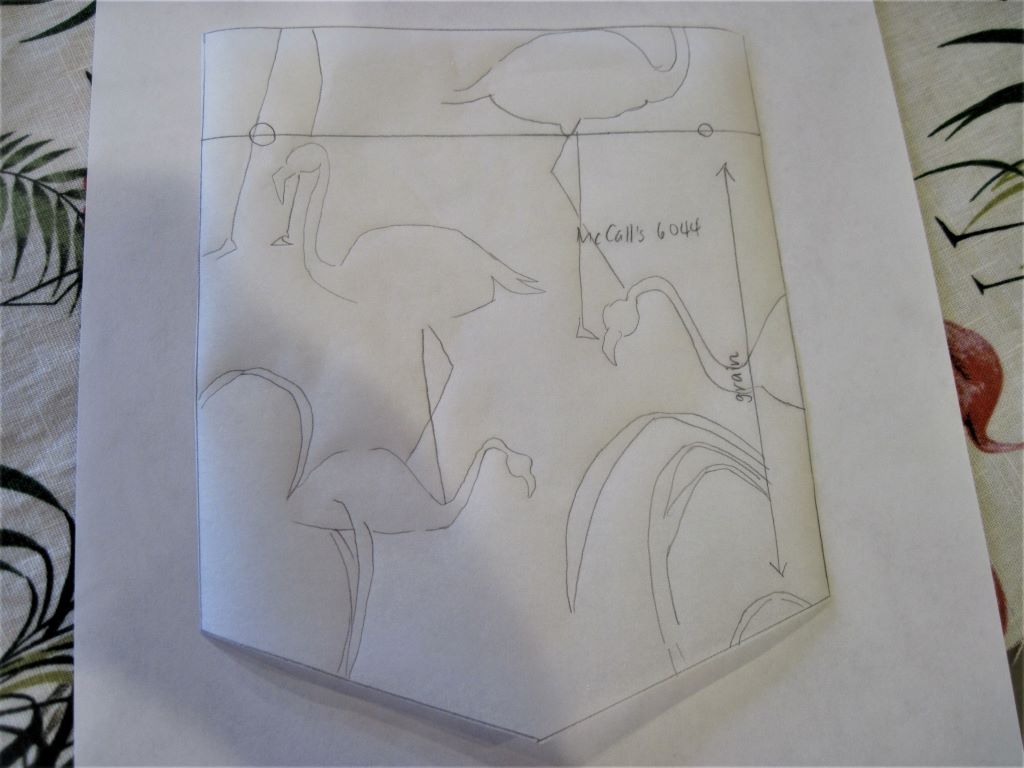
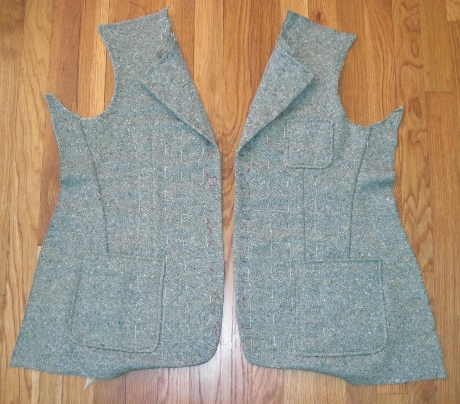
Then I laid down the front pattern piece, altered and traced onto translucent tracing paper. I slid it around on the print to see which motifs to highlight. I especially wanted to see what motifs would be on the pocket.
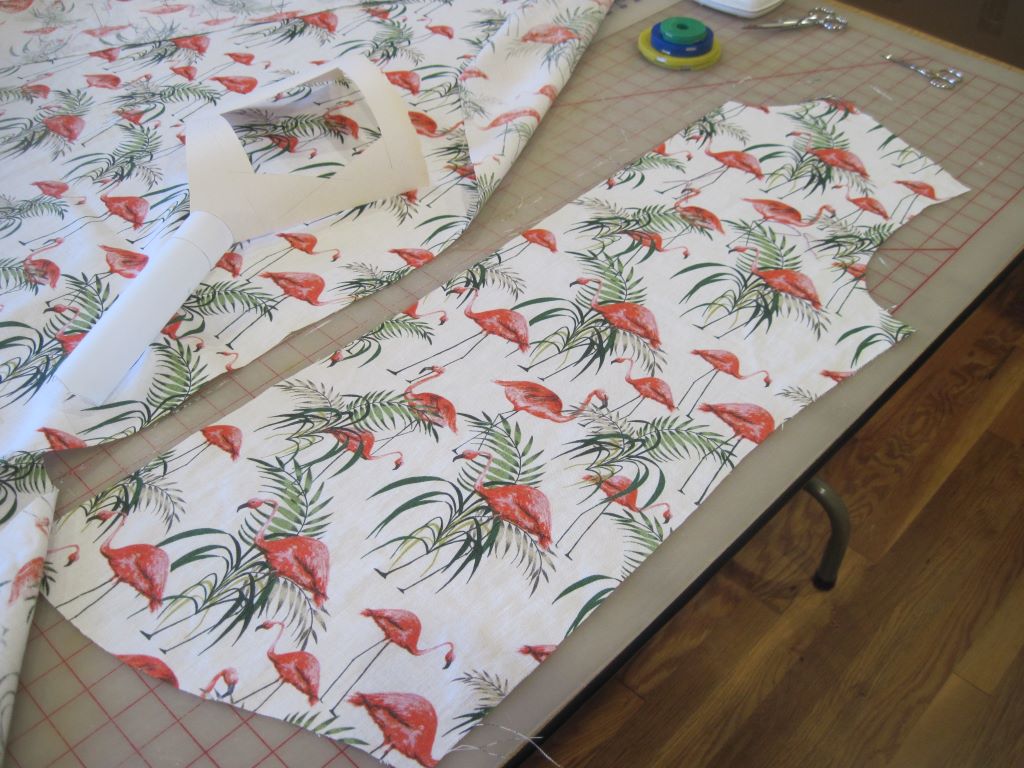
I cut a tracing-paper pocket pattern piece and traced some of the motifs so I could cut the pocket precisely. I probably hand-basted the pocket in place before machine-stitching it onto the left front.
Only after I cut the left piece and attached the pocket did I cautiously, methodically, cut the right front piece to match.
Next to cut were the front bands, which made me nervous. If I cut them wrong I wouldn’t have enough yardage to cut new ones–and what if Britex had sold out of this print in the meantime? Then what? It was imperative that I know exactly what part of each front band would be visible and have to match its front.
It occurred to me that I could cut about a 12″ length of tracing paper the same width as the front band and machine-baste the tracing paper to the front in a practice run. I could press in the folds of this mock front band like the real deal. And then I could trace the motifs from the front accurately onto the tracing paper, with no fear of shifting. Then I could undo the machine basting and release my paper template to use to trace the fabric band.
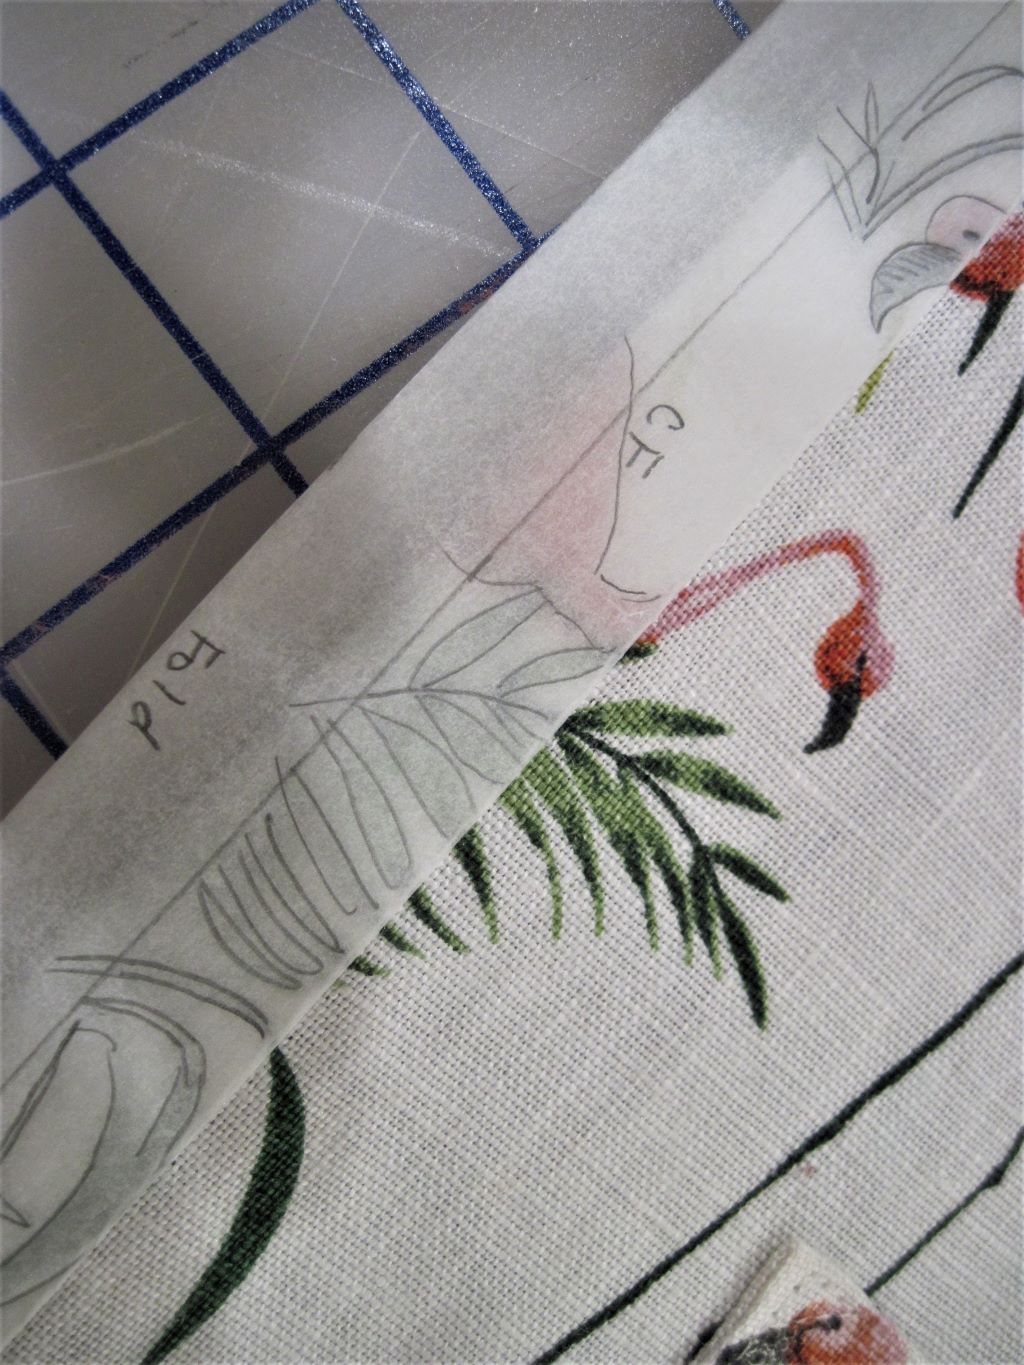
Happily, my trick worked.
To continue assuring accuracy, I hand-basted the front band in place before machine-stitching it down.
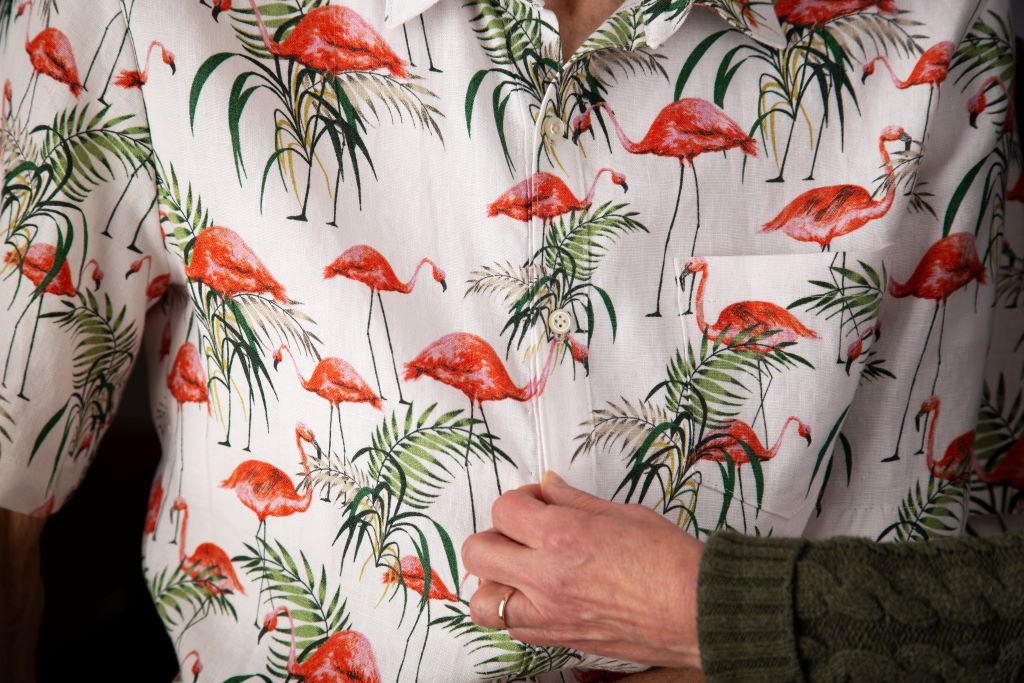
The fronts and front bands matched beautifully, which was very satisfying.
I positioned the back piece to be compatible with the fronts without matching at the side seams, which was acceptable. I also cut the sleeves, collar, and collar band this way; I was looking for an overall pleasing feeling rather than matching. I know, not everything can be matched, anyway. You have to make sensible choices, honor a few conventions, and aim for something that’s not disturbing to the average eye.
I realized that this shirt provided an unexpected first for me: I sewed it way out of season. I finished it on November 1, knowing that summery weather wouldn’t reach central Ohio for months. But even just hanging in the closet this shirt is doing its job: reminding us that when the warm weather does come Jack will be attired in plumage almost as glorious as these flamingos’.
And that brings a smile to both our faces.

Related Posts

Outstanding job with repeats; exceptional eye for matching the motif with the guy.
Thank you!
Wow! Thanks, Paula. This post is just what I needed today. That is one snappy shirt. As usual, your attention to detail certainly paid off. Beautiful work. And as you mentioned, the fabric looks like a nice quality linen. Looks very stylish on Jack!
A wonderful description of an amazing process. We cannot look at this shirt again without enjoying the thinking behind it. Jack, you are one lucky guy! May you both enjoy this garment for a long, long time.
Thank you, Rosa!
Good to see your blog back up and running. I was fortunate enough to see the flamingo 🦩 shirt in person and I just loved it.
Thanks, Tom. I’m glad you like it!
I adore this print! With all of the thought and work you put into this shirt, Jack is one lucky guy ♡
Thank you, Sue! I’m lucky I have this guy to sew for!
The shirt suits Jack perfectly. Great job how you managed to position the motifs so well.
Thank you, Martina! Hand-sewing was key to maintaining accuracy, and I was reminded how much I enjoy the handwork.
Jack’s Flamingo Shirt is my all time favorite of everything that you have made, Paula! Everything that you have made is perfect, but, the Flamingo Shirt is truly outstanding! Your matching of the design is unbelievable! It looks and fits perfectly on Jack!
Jack is lucky to have his personal designer and seamstress! I hope to see The Flamingo Shirt on him often this summer!
Thanks, Marilyn! You have more faith in my abilities than I do! Maybe Jack will set a new trend in our neighborhood with this shirt!
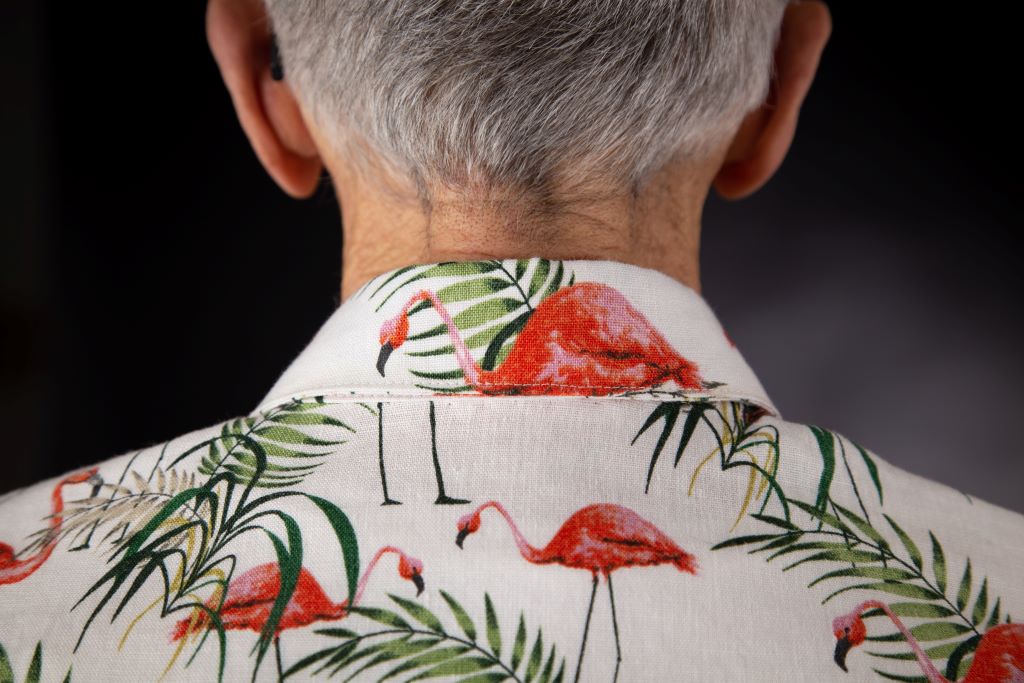
This article put a smile on my face! I especially like the flamingo centered so nicely on the back collar. I’m equally impressed with the shirt and how you’ve displayed it in the blog along with the narrative which kept me captivated.
Thank you, Mark! Cynthia’s photographs deserve a great deal of the credit!
This shirt is such a success! I really love it. Thanks for sharing all your cool tricks for pattern matching.
Thank you, Elaine! The tracing paper one was out of desperation. That’s the most likely time I’ll come up with a trick–the press of necessity.